
In the world of interior design, aesthetics and functionality often go hand in hand. One area where this harmony is particularly crucial is in managing acoustic environments. Whether it’s a bustling office, a recording studio, or a home theater, the quality of sound can significantly impact the experience within a space. Enter acoustic panels – versatile, effective, and increasingly popular solutions for controlling reverberation and noise levels.
Acoustic panels, also known as sound panels or sound-absorbing panels, come in various shapes, sizes, and materials. From sleek fabric-wrapped panels to stylish wooden designs, there’s a panel to suit every taste and requirement. However, installing these panels correctly is key to maximizing their acoustic benefits. Here’s a comprehensive guide on how to hang acoustic panels effectively:
- Assessing the Space: Before diving into installation, take some time to assess the acoustic needs of the space. Identify areas where sound reflection is prominent or where noise levels tend to be higher. This initial evaluation will help determine the placement and quantity of acoustic panels required.
- Panel Placement: The strategic placement of acoustic panels is crucial for optimal performance. Consider positioning panels at reflection points, where sound waves bounce off surfaces. Common reflection points include walls opposite speakers or where the ceiling meets the walls. Additionally, focus on areas where sound absorption is needed the most, such as corners or areas with hard surfaces.
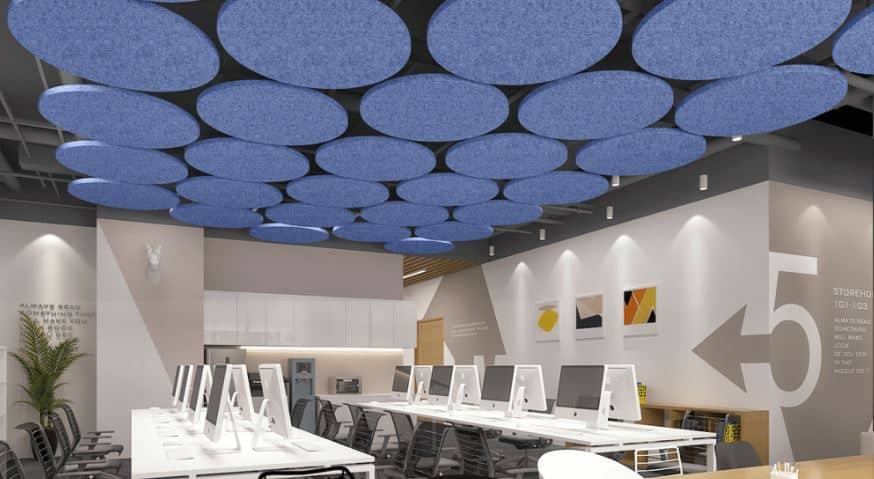
- Mounting Options: Acoustic panels can be mounted in various ways, depending on the panel design and the surface of the installation site. Common mounting options include adhesive mounting, impaling clips, Z-clips, or even suspension systems for ceiling installations. Choose a mounting method that ensures secure attachment while complementing the aesthetic appeal of the panels.
- Preparing the Surface: Before mounting the panels, ensure that the surface is clean, dry, and free from dust or debris. For adhesive mounting, use appropriate adhesives recommended by the panel manufacturer. If using impaling clips or Z-clips, mark the mounting points accurately and ensure proper alignment for a secure fit.
- Spacing and Coverage: Pay attention to spacing between panels to achieve uniform coverage without overcrowding or leaving gaps. The ideal spacing will vary depending on the panel’s size, thickness, and acoustic properties. In general, aim for a balance between sufficient coverage and preserving the room’s aesthetic appeal.
- Consider Aesthetics: While the primary goal of acoustic panels is sound absorption, they can also contribute to the overall aesthetics of a space. Choose panel designs, colors, and textures that complement the existing decor or architectural elements. Many manufacturers offer customizable options to match specific design preferences.
- Experiment and Fine-Tune: Don’t be afraid to experiment with panel placement and configurations to achieve the desired acoustic results. Fine-tune the arrangement based on subjective listening tests and feedback from occupants or audio professionals.
- Maintenance and Care: Regular maintenance is essential to ensure the longevity and effectiveness of acoustic panels. Vacuum or gently brush fabric-wrapped panels to remove dust and debris. For wooden or other non-fabric surfaces, use appropriate cleaning methods recommended by the manufacturer.
Hanging acoustic panels is not just about sound control – it’s about creating a harmonious blend of functionality and aesthetics within a space. By following these guidelines and paying attention to detail, you can transform any room into an acoustically pleasing environment that resonates with both style and substance.
Say Goodbye to Ceiling Cracks: A Quick Guide to Repair
Ceiling cracks are not just unsightly; they can also be a sign of underlying structural issues. Fortunately, repairing them doesn’t have to be a daunting task. Start by cleaning the area and removing any loose debris. Next, apply a quality joint compound to fill the crack, ensuring smooth application. Once dry, sand the area gently for a seamless finish. Finally, prime and paint to match the surrounding ceiling. Remember, if the crack is extensive or recurring, it’s best to consult a professional for a thorough inspection and repair. Don’t let cracks mar your ceiling’s beauty – tackle them head-on for a flawless finish. Restore your space with professional ceiling crack repair services. Discover expert solutions to fix cracks, enhance aesthetics, and maintain structural integrity. Trust our skilled team to deliver seamless results for a flawless finish. Elevate your space and ensure lasting quality with our comprehensive ceiling crack repair services